Quilting with Silk
Let me say from the outset, I am a cotton girl at heart! I've dabbled with silks for my Little Bouquet quilts, but never anything serious, or big like a quilt.
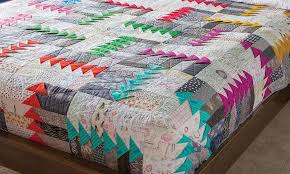
So, for those of you that may be interested in a working with dupioni silks, or you would like to create your own version of Silk Tempest, but are just a little leary - let me share what I've learned.
Silk frays something awful (it couldn't be as gorgeous as it is, and there not be a price to pay, right?)To control fraying consider using a lightweight fusible interfacing - my #1 recommendation
Use pinking shears, or a rotary cutter with a pinking blade
Use 1/2" seam allowance, versus a 1/4" seam allowance normally used in quilting (for use without the interfacing or pinking)
Lengthen the stitch length slightly
Adjust your iron's temp to the silk setting
There are special machine needles for working with silk, but I used a sharp #60 needle
Cutting the silk into strips for the quilt seemed more like cutting thin bark, or paper than cutting fabric - it is a different animal than 100% cotton
Be mindful of the orientation of the warp & weft when piecing your blocks
Create each block individually as vs. usual strip piecing methods. I found the more I handled the fabric, the more it wanted to shred. Working with silk does require a little more delicate handling.
On a personal note: To create the Silk Tempest I used a 1/2" seam allowance, which worked fine, but was a little disconcerting for me - since a 1/4" is so ingrained in my mind. After I created the quilt, I experimented with multiple methods for controlling the fraying, and the best solution in my opinion is the interfacing.
I was a little anxious about quilting on silk, but as you can see from the photo, it worked wonderfully. I used YLI 100# silk thread on the top for the quilting, and Gutermann 50# weight in the bobbin.
Use quilting cotton for the binding, and the quilt back.
For the batting I used Hobb's fusible batting, it worked great!


Comments
Post a Comment